| Home | SOL9 Samples | SOL9 Tutorial | SOL9 FAQ | SOL9 ClassTree | SOL9 ClassList |
1 What is SOL9?
1.1 SOL9
SOL9 is one of the simplest C++ class libraries for Windows10. It is based on author's previous version SOL++2000. We provide a set of C++ class header files and a lot of sample programs.
One of the striking features of SOL9 is the simplicity of handling of Windows events.
Historically, the author started to develop the original SOL++ C++ library on Windows 95 about twenty years ago. And now here is a new version of SOL9 for Visual Studio 2019 on Windows 10.
The SOL9 library is based on the previous SOL++2000. For original SOL++ library, see author's book(Windows95 Super class library, SOFTBANK Japan:ISBN4-7973-0018-3).
The hierarchy of SOL9 is quite similar to that of SOL++2000. But We have introduced a namespace 'SOL' to avoid collision of some class names in Windows API. But the basic implementation of SOL9 is same with old SOL++2000.
On SOL9 we implemented all the member functions inside the C++ classes; of cource, you may not like it. This is not a conventional coding style of C++ of separating implementation and interface. Since we are not faithful followers of a conventional C++ coding style, we don't care about a policy of the separationism of interfarce and implementation. But SOL9 coding style has one point which enables a rapid prototyping of writing and testing C++ prograqms quickly. It may (or may not) be useful for various experimentation projects.
The latest SO9 library supports not only traditional Windows applications, but also Direct3D10, Direct3D11, Direct3D12, OpenGL and OpenCV applications, which are our main ROI these days. For details, please refer our samples page.
1.2 Download SOL9 Library
A set of SOL9 C++ Class Library and sample programs for Windows is available. This is a free C++ class library for all Windows programmers.
The latest version supports the standard Windows APIs, Direct3D10, Direct3D11, Direct3D12, OpenGL and OpenCV-4.2.0 on Window 10 Version 1903, and we have updated SOL::SmartPtr class to use std::unique_ptr of C++11. Furthermore, to support OpenCV--4.2.0, we have updated OpenCVImage, OpenCVMat, and OpenCVImageInfo classes.
|
Please see https://github.com/opencv/opencv/wiki/ChangeLog#version420 Breaking changes: Disabled constructors for legacy C API structures. In OpenCV-4.2.0, the following naive code will cause a compilation error. cv::Mat mat; ... IplImage ipl = mat; //Error The above line should be rewritten like this: IplImage ipl = cvIplImage(mat); //OK |
In sol9-2.1.2, we have added a YOLO C++ sample program:
YoloObjectDetector
, which is based on Detector class in yolo_v2_class.hpp in include folder of darkent-master.
In sol9-2.1.3, we have added another YOLO C++ sample program:
CustomYoloObjectDetector
, which is based on C++ Detector3 class written by C APIs of dector.c, image.c, etc. in darknet-master/src folder of darkent-master.
In the latest sol9-2.1.4, we have added another simple YOLO C++ sample program based on C++ Detector3:
DetectedObjectHTMLFileGenerator
Download:
SOL9-2.1 C++ Class Library for Windows 10 (Library & Samples) (sol9-2.1.5-vs2019-win10-version-1903 #2020.02.10)
SOL9.2.0 C++ Class Library for Windows 10 (Library & Samples) (sol9.2.0.74-vs2017-win10-april-2018-update #2018.12.31)
In the latest sol9-2.1.0 library for Visual Studio 2019 on Windows 10 April 2018 Update, we have updated a lot of Makefiles of the library sample programs to be compiled on VS2019 and to support opencv-4.1.0.
1.3 SOL9-2.1.0
SOL9 C++ Class Library 2.0 (SOL9-2.1.0) is an upgrade version of the previous SOL9 Library.
Note:
1. SOL9 2.0 supports multiple charsets of ASCII and UNICODE.
2. SOL9 2.0 classes have been implemented on C++ header files only using inline member functions.
3, SOL9 2.0 applications never need a SOL9 specific static library.
4. SOL9 2.0 classes have been developed based on the previous SOL9 Asciicode and Unicode version.
2 How to install the SOL9
You can get a zip file sol9-2.1.0.zip by downloading, so you simply unzipp it by WinZip program. For example, by unzipping on the root directory on C drive, you get the two directories:
C:\so9-2.1.0\usr\include\sol
- includes all C++ header files for SOL9-2.1.0
C:\sol9-2.1.0\usr\src\
- includes all sample program files for SOL9-2.1.0,
3 How to create a new project.
When you create a new project and compile the program on SOL9 in Microsoft Visual Studio(VS) environment, please note the following rules.
3.1 You have to specifiy [Multithreaded] runtime library in C/C++ Code generation pane.
(1) Select [Project] item in the menubar of VS.
(2) Select [Setting] item in the pulldown menu dispayed by (1).
(3) Select [C/C++] tab in the rightside pane of the dialogbox displayed by (2)
(4) Select [Code generation] item in the combobox for [Category] item in the pane displayed by (3).
(5) Select [Multithreaded] item in the combobox for [Runtime Library] item in the pane displayed by (4).
3.2 You have to set correct paths for include files and a library file of SOL9.
(1) Select [Tool] item in the menubar of VS.
(2) Select [Option] item in the pulldown menu displayed by (1)
(3) Select [Directory] pane the dialogbox displayed by (2).
(4) Add the path for SOL9 include files in th listbox displayed by selecting [include files] item in the combobox of [Directories]. Maybe you add a line something like this.
c:\usr\include
3.3 You have to specifiy the libraries
Please specify the following libraries:
[comctl32.lib ws2_32.lib iphlpapi.lib version.lib crypt32.lib cryptui.lib wintrust.lib pdh.lib shlwapi.lib psapi.lib].
(1) Select [Project] item in the menubar of VS.
(2) Select [Setting] item in the pulldown menu dispayed by (1).
(3) Select [Link] tab in the rightside pane of the dialogbox displayed by (2).
(4) Select [General] item in the combobox for [Category] item in the pane displayed by (3).
(5) Insert the libraies [comctl32.lib ws2_32.lib iphlpapi.lib version.lib crypt32.lib cryptui.lib wintrust.lib pdh.lib shlwapi.lib psapi.lib] into the text field of name [Object/Libray/Module].
Please don't forget to write Main (not main) function in your Windows program, because it is a program entry point of SOL9.
4 Kittle cattle in Windows
4.1 How to get a Windows Version?
4.2 How to render a text on Direct3D11?
4.3 How to render an image on Direct3D11?
4.4 How to render a geometrical shape on Direct3D11?
4.5 Effect interfaces have passed away in Direct3D11?
4.6 How to render a multitextured cube in OpenGL?
4.7 How to use OpenGL Shader Language feature of OpenGL 2 based on GLEW?
4.8 How to use GL_ARB_vertex_buffer_object extension of OpenGL based on GLEW?
4.9 How to change RGB-Color, EyePosition, and LightPosition for 3D-Shapes in OpenGL?
4.10 How to draw shapes by using multiple PipelineStates in Direct3D12?
4.11 How to render a textured cube in Direct3D12?
4.12 Is there a much simpler way to upload a texture in Direct3D12?
4.13 How to render a text on Direct3D12?
4.14 How to render multiple textured rectangles in Direct3D12?
4.15 How to use multiple ConstantBufferViews to render translated shapes in Direct3D12?
4.16 How to render MultiTexturedCubes in Direct3D12?
4.17 How to render a star system model in Direct3D12?
4.18 How to render multiple materialized shapes in OpenGL?
4.19 How to render a textured sphere in OpenGL?
4.20 How to render a star system model in OpenGL?
4.21 How to blur an image in OpenCV?
4.22 How to sharpen an image in OpenCV?
4.23 How to detect faces in an image in OpenCV?
4.24 How to detect features in an image in OpenCV?
4.25 How to enumerate Video Input Devices to use in OpenCV VideoCapture?
4.26 How to map cv::Mat of OpenCV to a shape of OpenGL as a texture?
4.27 How to read a frame buffer of OpenGL and convert it to cv::Mat of OpenCV?
4.28 How to transform an image by a dynamic color filter in OpenCV?
4.29 How to render a textured sphere with Axis, Eye, and Light Positioner in OpenGL?
4.30 How to detect a bounding box for an object in a cv::Mat of OpenCV?
4.31 How to detect people in a cv::Mat image by using HOGFeature of OpenCV?
4.32 How to create CustomYoloObjectDetector class based on C APIs of darknet-master?
4.33 How to create DetectedObjectHTMLFileGenerator for YOLO by using SOL Detector3 and a template.html file?
4.1 How to get a Windows Version?
As you know, in Windows 8.1 and later Windows version, GetVersion(Ex) APIs have been deprecated. Those APIs would not return a correct version value under those systems, without specifying a supportedOS tag for Windows 8.1 or Windows 10 in the application manifest file. ( Operating system version changes in Windows 8.1 and Windows Server 2012 R2),. As for a sample program using a manifest file with the supportedOS tags, please see WindowsVersion.
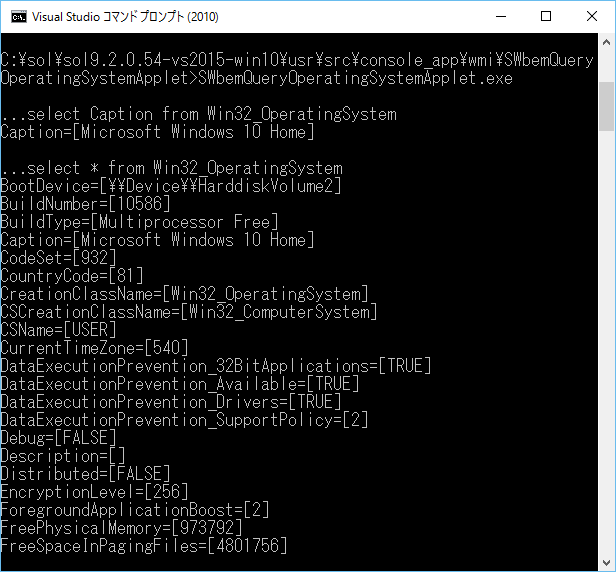
If you are familiar with WMI programming, it may be better to use WMI Win32_OperatingSystem class to get the correct Windows version (OS Name).
In the latest SOL9.2.0 library, we have implemented SOL::SWbemQueryOperatingSystem C++ class to query various information on Windows operating system.
This example based on the C++ class shows how to get "Caption" property, which contains a Windows OS name, and All ("*") properties of Windows System. See also a GUI version SolOperatingSystemViewer
4.2 How to render a text on Direct3D11?
As you maybe know, Direct3D10 has ID3DX10Font interface to render a text, but Direct3D11 has no corresponding interface something like a ID3DX11Font.
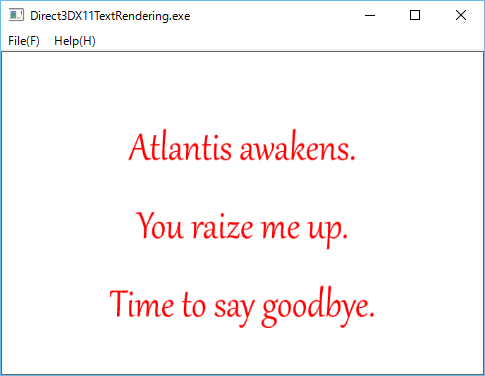
On Direct3D11, you will use IDWrite interfaces, for example IDWriteTextFormat or IDWriteTextLayout, to draw a text on an instance of ID2D1RenderTarget created by ID2D1Factory interface. See aslo our directx samples: DirectWriteTextFormat. and DirectWriteTextLayout.
This example based on SOL Direct2D1, DirectWrite, Direct3D11 classes shows how to render a text string on Direct3D11 environment.
4.3 How to render an image on Direct3D11?
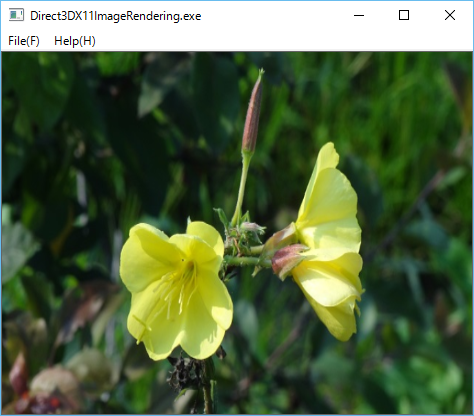
Direct3D10 has ID3DX10Sprite interface to draw an image, but Direct3D11 has no corresponding interface something like a ID3DX11Sprite. On Direct3D11, to read image files, you will use the WIC (Windows Imaging Component) interfaces, and to display the read images, an instance of ID2D1Bitmap created by WIC interfaces, and ID2D1RenderTarget created by ID2D1Factory interface. See aslo our directx samples: Direct2DBitmap. and WICBitmapScaler.
This example based on SOL Direct2D1, WIC, Direct3D11 classes shows how to render an image file on Direct3D11 environment.
4.4 How to render a geometrical shape on Direct3D11?
Direct3D 10 has ID3DX10Mesh interface to store vertices and indices data of geometrical shapes, and to draw the shapes by using ID3D10Effect and related ID3D10EffectVaraible interfaces, but, Direct3D 11 has no corresponding interface something like ID3DX11Mesh.
Direct3D10 Sample C++ programs also provides some optional APIs based on ID3DX11Mesh to create typical shapes such as Box, Cylinder, Polygon, Sphere, Torus, Teapost (See: Microsoft DirectX SDK (June 2010)\Samples\C++\DXUT\Optional\DXUTShape.h) , but Direct3D 11 has no optional creation APIs for such shapes.
Fortunately, in almost all cases, the ID3DXMesh interface will be replaced by a pair of vertexBuffer and indexBuffer which are Direct3D11 ID3D11Buffers respectively.
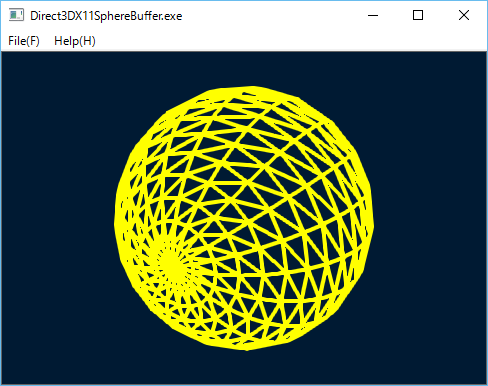
On Direct3D11 environment. you will be able to write APIs to draw the typical geometrical shapes, by using ID3D11Buffer interface.
In fact, on the latest SOL9.2.0.41 library, we have implemented the following C++ classes based on the DXUT\Optional\DXUTShape.cpp for Direct3D 11:
This example shows how to render a sphere on Direct3D11 environment.
4.5 Effect interfaces have passed away in Direct3D11?
It could be so. In fact, you cannot find a 'd3d11effect.h' file for Direct3D 11 effect interfaces in the standard include folder
'C:\Program Files (x86)\Microsoft DirectX SDK (June 2010)\Include'.
However, you can see an optional Direct3D 11 effect library in the sample folder
'C:\Program Files (x86)\Microsoft DirectX SDK June 2010)\Samples\C++\Effects11'.
This implies that Direct3D 11 effect interfaces have been graded down to the optional sample from the standard. By the way, what differences are there on the interfaces between Direct3D10 and Direct3D11? The methods of those interfaces are basically same, but Direct3D11(Effects11) has no EffectPool interface.
In the latest sol9.2.0.43 library, we have implemented the C++ classes for the optioal Direct3D11 effect interfaces.
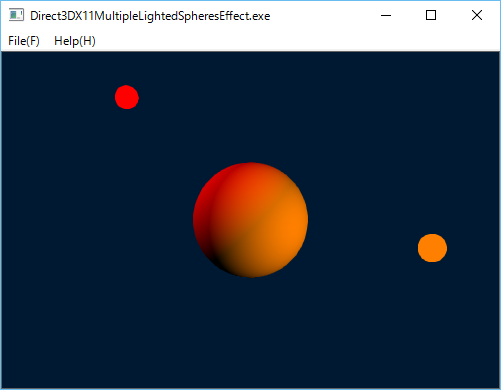
This example shows how to use Direct3DX11Effect classes on Direct3D11 platform.
4.6 How to render a multitextured cube in OpenGL?
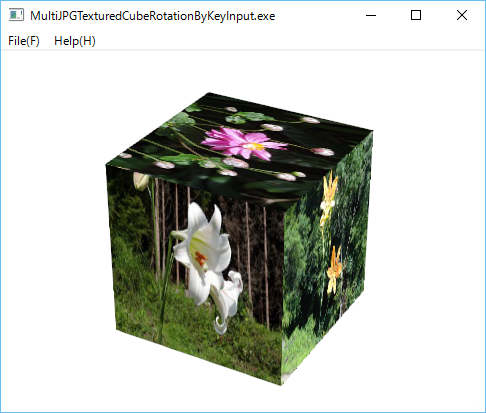
We have C++ class OpenGLMultiTexturedCube to render a cube textured by multiple JPG or PNG image files.
This is a simple sample program based on that class, and six JPG files for the cube fases.
In this program you can rotate the textured cube by Left and Right keys.
4.7 How to use OpenGL Shader Language feature of OpenGL 2 based on GLEW?
In SOL2.0.48 ,we have updated our OpenGL C++ classes to use GLEW in order to create a context-version-dependent context, and to use the features of OpenGL Shader Language.
Currently, the default major version and the minor version for OpenGLRenderContex class are 3 and 1 respectively. You can also specify those versions in the the file 'oglprofile.ogl' file placed in a folder of the executable program.
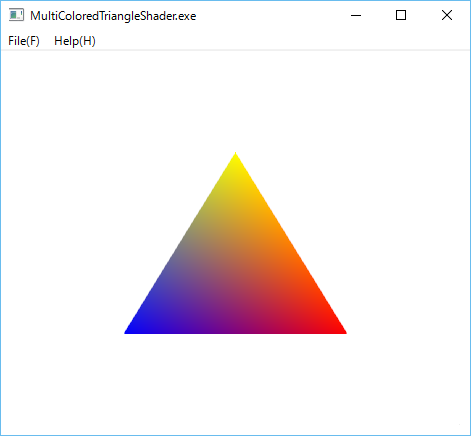
This is a very simple sample program to use OpenGLProram, OpenGLFragmentShader, and OpenGLVertexShader, and OpenGLVertexAttribute classes to draw a multicolored triangle.
4.8 How to use GL_ARB_vertex_buffer_object extension of OpenGL based on GLEW?
In the lastest SOL9.2.0 library, we have added new classes OpenGLBufferARB, OpenGLBufferedShapd, OpenGLIndexBufferARB, and OpenGLVertexBufferARB to 'sol/openglarb/' folder to support GL_ARB_vertex_buffer_object extension in GLEW.
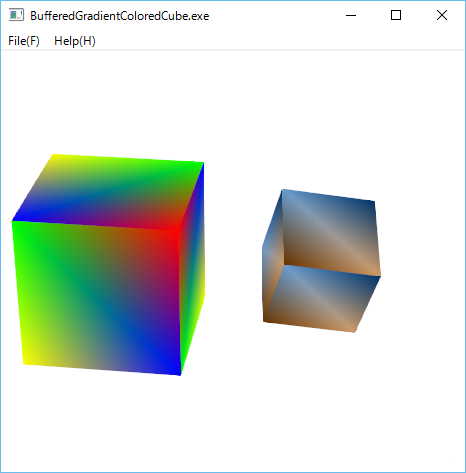
This is a very simple sample program to draw OpenGLColoredCube by using those classes.
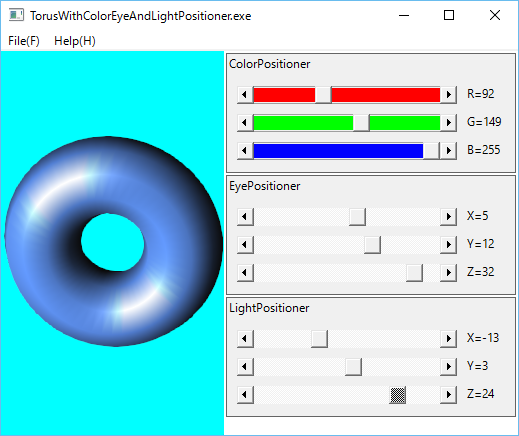
4.9 How to change RGB-Color, EyePosition, and LightPosition for 3D-Shapes in OpenGL?
In the lastest SOL9.2.0 library, we have added new classes Positioner, ColorPositioner, EyePositioner and LightPositiner to 'sol/' folder. Those have been implemented by Windows ScrollBar triplet, which are based on SOL::ColorMixer class. This is a very simple sample program to draw Glut SolidTors by using those classes.
4.10 How to draw shapes by using multiple PipelineStates in Direct3D12?
In the lastest SOL9.2.0 library, we have added new classes to support Direct3D12 on Windows 10 to 'sol/direct3d12' folder. We have implemented the Direct3D12 in a similar way of our Direct3D11 classes to keep compatibilies between them.
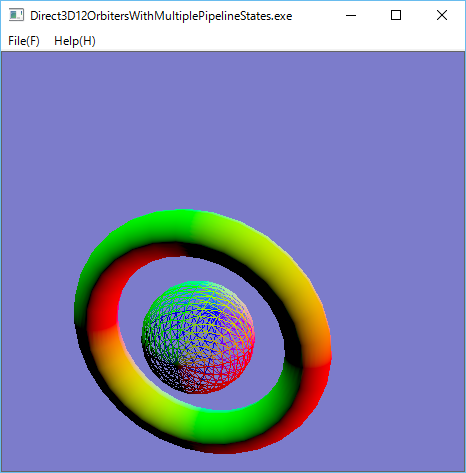
This is a very simple sample program to draw a wireframed sphere and a solid torus moving on a circular orbit by using two PipelineState objects, and TimerThread.
4.11 How to render a textured cube in Direct3D12?
In Direct3D12, it is not so eay to render a textured shape rather than Direct3D11, because in standard D3D12 programming environment, you have to live without D3DX (see:Living without D3DX). For example, there are no D3DX12CreateShaderResourceViewFromFile or something similar APIs to create a shaderResourceView from an image file or an image on memory in D3D12X (d3d12x.h).
Fortunately, however, you can find some very convenient APIs to read an image file, and to upload the correspoing texture in the following extension package from Microsoft:
Microsoft/DirectXTK12
It teaches us the following:
1. Use CreateTextureFromWIC API, which is an image file reader based on WIC(Windows Imaging Component) to create D3D12 intermediate texture resource from a standard image file such as BMP, JPG, PNG, etc.
2. Use UpdateSubresources API to upload the intermediate texture resource created by CreateTextureFromWIC to a target texture resource.
We have updated class WICBitmapFileReader and implemented new C++ class Direct3D12Subresources to use those APIs.
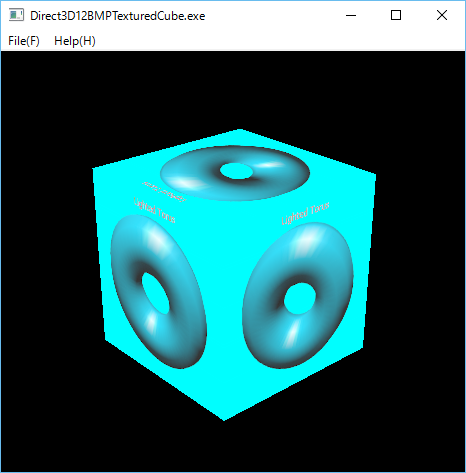
This is a very simple sample program to render a BMP textured cube by using those classes,
4.12 Is there a much simpler way to upload a texture in Direct3D12?
In the above Direct3D12BMPTexturedCube sample program, we have used very complicated WICBitmapFileReader and Direct3D12Subresources classes, which are based on the source files in Microsoft/DirectXTK12 toolkit.
It is much better to be able to write much simpler classes to read an image file and to upload a texture, even if they may have some restrictions, by using our C++ class library, without the toolkit.
In fact, we are able to write the following classes which are simpler than the classes based on the toolkit:
1 ImageFileReader to read an image file reader for PNG and JPG only written by using JPGFileReader and PNGFileReader classes.
2 Direct3D12IntermediateResource to upload an intermedaite texture resource to a desitination texture resource.
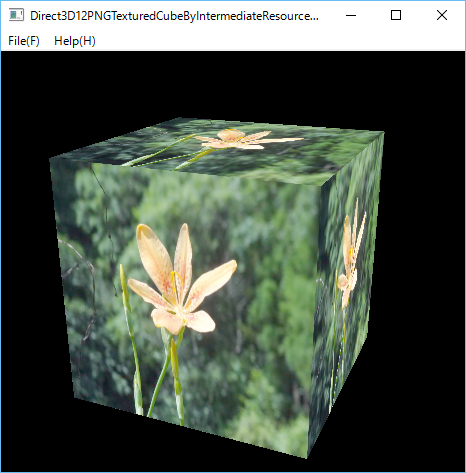
This is a very simple sample program to render a PNG textured cube by using the simpler classes,
4.13 How to render a text on Direct3D12?
As you know, Direct3D11 and Direct3D12 have no interfaces something like ID3DX11Font or ID3DX12Font to render a text. But as shown in How to render a text on Direct3D11, you can use IDWriteTextFormat or IDWriteTextLayout, to draw a text on an instance of ID2D1RenderTarget created by ID2D1Factory interface.
In Direct3D12, you can use ID11On12Device to create D3D11Resource (wrappedResource), and render a text by using the wrappedResource.
See Direct3D 11 on 12
In the latest SOL9.2.0, we have implemented the following two classes to support ID11On12Device interface.
1. Direct3D11On12Device to create an ID3D11Resource (ID3D11 wrapped resource).
2. Direct3D11On12WrappedResource to represent the ID3d11 wrapped resource.
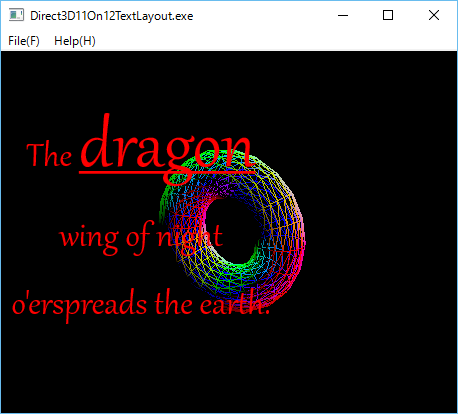
This example based on SOL DirectWrite(DXGI), Direct2D1, Direct3D12 classes shows how to draw a text string on a torus rendered on Direct3D12.
4.14 How to render multiple textured rectangles in Direct3D12?
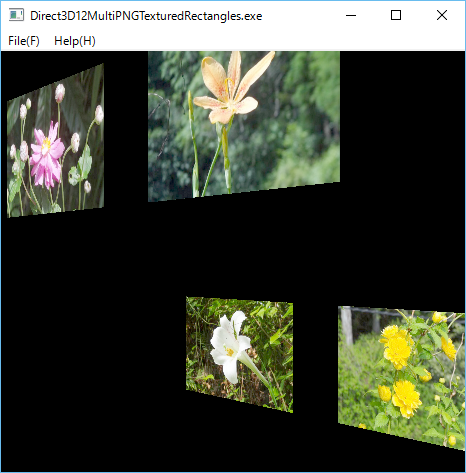
In order to render multiple textured shapes, we have to create multiple instances of Direct3DX12Shape, Direct3D12Texture2D and Direct3D12ShaderResourceViews. Of course, we also have to create a rootSignature object having the number of descriptors corresponding to the multiple ShaderResourceViews.
We have updated class Direct3D12RootSignatureto be able to specify the number of ConstantBufferViews and the number of ShaderResourceViews respectively.
This is a very simple sample program to render four PNG textured rectangles by using those classes,
4.15 How to use multiple ConstantBufferViews to render translated shapes in Direct3D12?
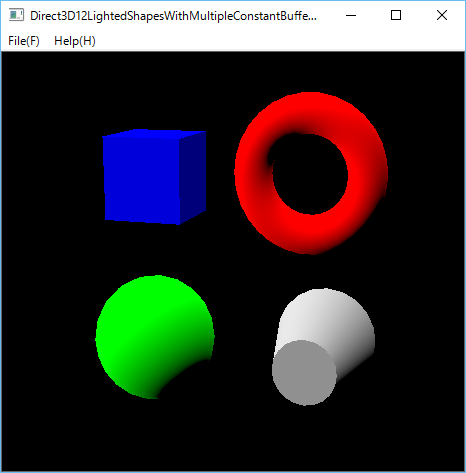
Imagine to render some geometrical shapes(Box, Sphere, Torus, Cylinder and so on) in the translated positions on WorldViewProjection system in Direct3D12.
In Direct3D11, it is simple and easy as shown in Direct3DX11MultipleLightedShapesBuffer
In Direct3D11, we only have to create one ConstantBufferView for multiple shapes, whereas in Direct3D12 we have to create multiple ConstantBufferViews to specify the translated position on WorldViewProjection system for each shape, and also a RootSignature having the number of descriptors corresponding to the multiple ConstantBufferViews.
This is a very simple sample program to render Box, Sphere, Torus, and Cylinder.
4.16 How to render MultiTexturedCubes in Direct3D12?
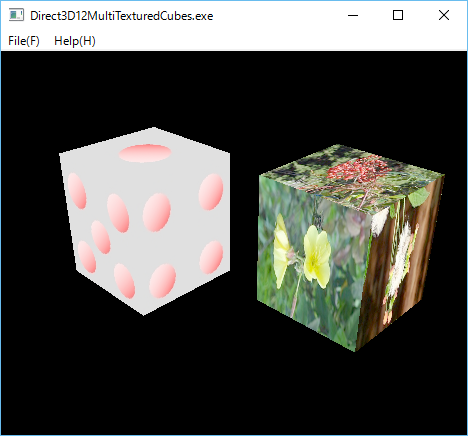
Imagine to render a cube textured with multiple image files in Direct3D12.
The sample program of 4.14 How to render multiple textured rectangles in Direct3D12? is helpful for it. As you can easily see, you will have to do the following things to create a multiTexturedCube:
1. Create a set of VertexBuffers and IndexBuffers for six square faces of a cube.
2. Create a set of Texture2D resources for six faces of the cube.
3. Create a set of Image resources for six faces of the cube.
4. Create a set of ShaderResourceViews for the texture2Ds.
. To clarify the problem, we have implemented the following C++ classes.
Direct3DX12MultiTexturedShape
Direct3DX12TexturedFace
Direct3DX12MultiTexturedBox
Direct3DX12MultiTexturedCube
This is a very simple sample program to render two MultiTexturedCubes.
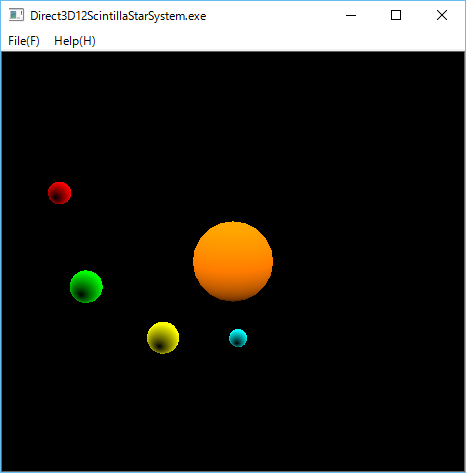
4.17 How to render a star system model in Direct3D12?
Imagine to render a star system model like our solar system on Direct3D12.
Since we are neither astrnomers nor model designers, apparently, it is difficult to draw a realistic solar system model, even if a lot of detailed planets trajectories data would have been given.
To simpify a story, we here assume an imaginary simple star system, say Scintilla, which consists of a single sun-like sphere star and some planet-like spheres rotating on circular oribits around the sun star, and furthermore, to avoid confusion, we do not care the complicated reflection light problem from the sun of the planets.
We simly have to the following things,
1 Create multiple Direct3DX12Sphere instances to describe spheres for the central star and planets.
2 Create multiple Direct3D12TransformLightConstantBufferView instances to describe the positions for the star and the planets in WorldViewProjection systems.
3 Create multiple Direct3DX12Circle instances to define circular orbits for the planets.
4 Create a Direct3D12TimerThread to move planets on the circular orbits.
5 Draw the sun star and planets rotating around the star by the ConstantBufferViews and the TimerThread.
The following Direct3D12ScintillaStarSystem is a simple example to draw a star system model.
4.18 How to render multiple materialized shapes in OpenGL?
As you know, in OpenGL, there is a glMaterial API to set material properties.
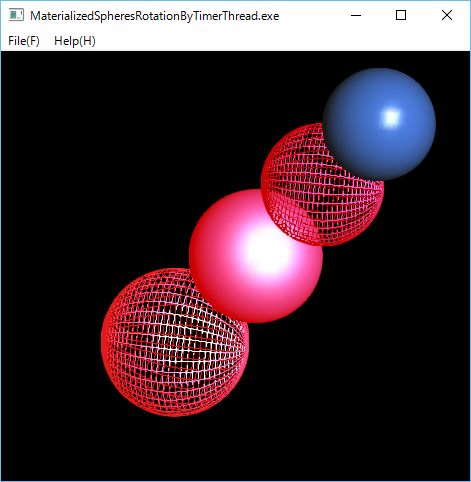
In the latest sol9.2.0, we have implemented OpenGLMateria class to store material properites:face, ambient, diffuse, specular, emission, shininess.
The following MaterializedSpheresRotationByTimerThread is a simple example to draw multiple matreialized sphere by using OpenGLMateria, and rotate them by OpenGLTimerThread.
4.19 How to render a textured sphere in OpenGL?
Imagine to render a textured sphere. In OpenGL, there are some methods to map a texture to a solid sphere.
1. To use gluSphere and gluQuadricTexture APIs in OpenGL GLU library.
See Texturing a Sphere.
2. To write your own code to draw a sphere with texture coordinates.
See Texture map in solid sphere using GLUT(OpenGL) .
Please note that you cannot use glutSolidSphere API of OpenGL GLUT library to map a texture on the sphere, because the API doesn't support texture coordinates.
In the latest sol9.2.0 library, we have implemented OpenGLTexturedSphere class based on the first method.
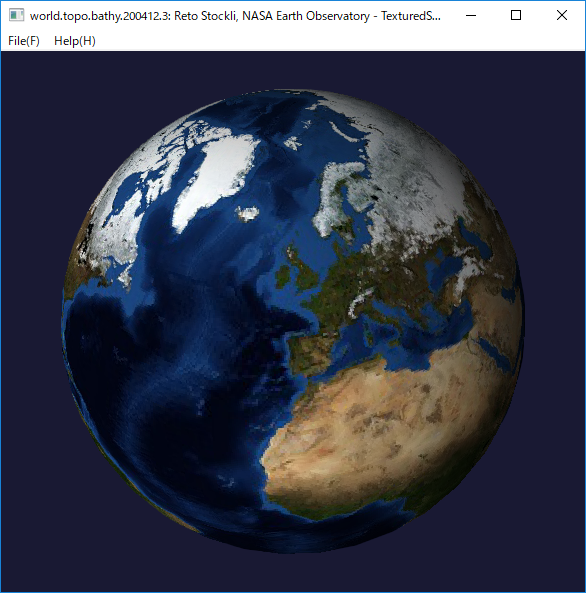
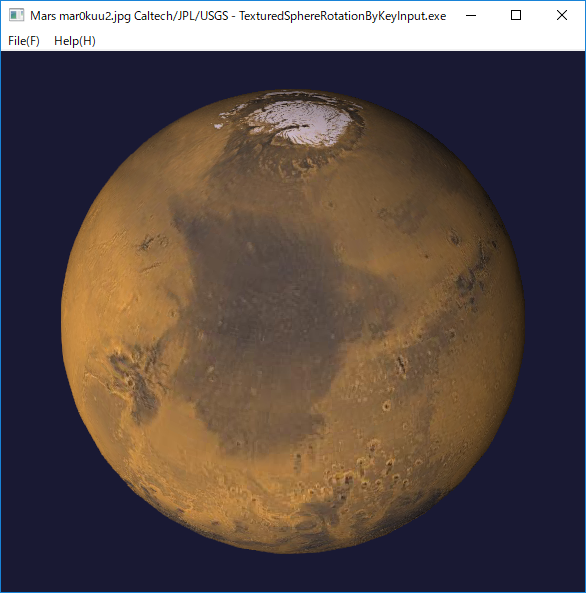
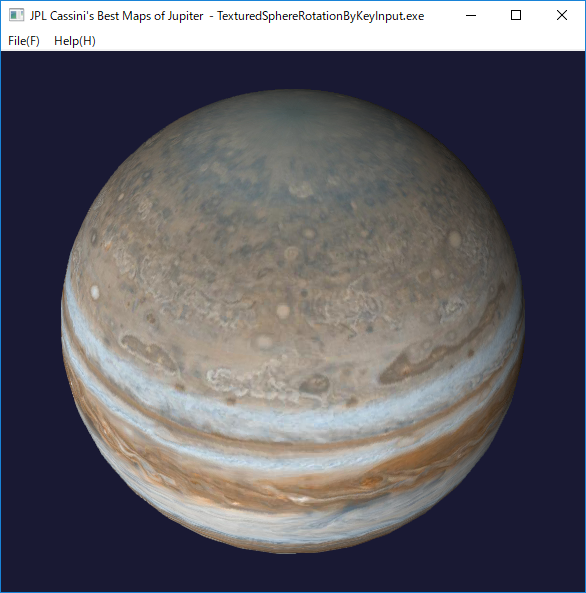
The following TexturedSphereRotationByKeyInput is a simple example to draw a textured shpere and rotate it by Left or Rigth keys.
In this example, we have used the world map of 'world.topo.bathy.200412.3x5400x2700.jpg' file in the following page.
NASA VISIBLE EARTH
December, Blue Marble Next Generation w/ Topography and Bathymetry
Credit: Reto Stockli, NASA Earth Observatory
We have also used Viking's Mars 'mar0kuu2.jpg' created by Caltech/JPL/USGS in the SOLAR SYSTEM SIMULATOR.
We have also used Jupiter 'PIA07782_hires.jpg' in the JPL Cassini's Best Maps of Jupiter.
4.20 How to render a star system model in OpenGL?
We have arleady written sample program Direct3D12ScintillaStarSystem to render a star system model in Direct3D12,
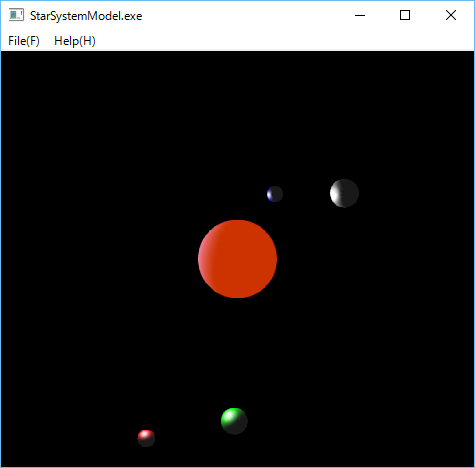
In OpenGL, we can also draw a simple star system model like our solar system. As the example of Direct3D12, to simpify a story, we assume an imaginary star system which consists of a single sun-like sphere star and some planet-like spheres rotating on circular oribits around the sun star , and furthermore, to avoid confusion, we do not care the light direction and reflection light problem of sun and the planets.
The following StarSystemModel is a simple example to draw a star system model.
4.21 How to blur an image in OpenCV?
As you know, OpenCV has some image filter classes and image-blur APIs Smoothing Images such as:
blur
GaussianBlur
medianBlur
bilateralFilter
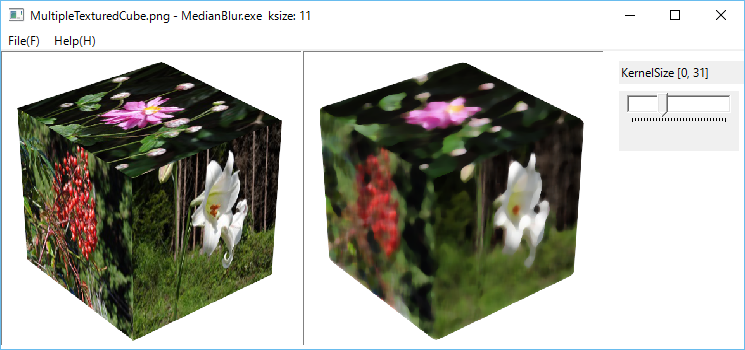
The following MedianBlur program is a simple example to blur an image based on mediaBlur funcition.
The left pane is an orignal image, and the right pane is a blurred image created by a KernelSize trackbar control.
4.22 How to sharpen an image in OpenCV?
As shown in Unsharp masking, Unsharp masking (USM) is one of the image sharpening techniques. It uses a smoothed (blurred), or "unsharp", negative image to create a mask of the original image.
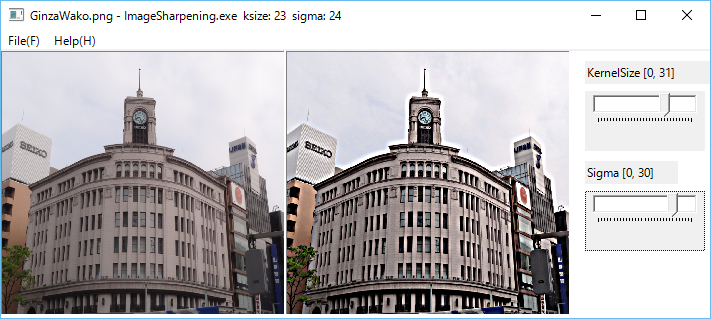
The following imageSharpening program is a simple image sharpening example based on the USM technique, in which we have used the following two APIs:
1 GaussinaBlur to create a blurred mask image from an original image.
2 addWeighted to combine the blurred image and the original image.
The left pane is an orignal image, and the right pane is a sharpened image created by KernelSize and Sigma trackbar controls.
4.23 How to detect faces in an image in OpenCV?
One of the most interesting feature of OpenCV is an image recognition or object detection, which is a very important technology in modern computer vision based systems.
For detail, please see the OpenCV documentation Cascade Classification Haar Feature-based Cascade Classifier for Object Detection.
In the latest OpenCV version, the following two types of cascade classifiers are available:
On these cascade classifiers, please check your OpenCV installed directory, for example, you can find folders including classifier files under the folder "C:\opencv3.2\build\etc".
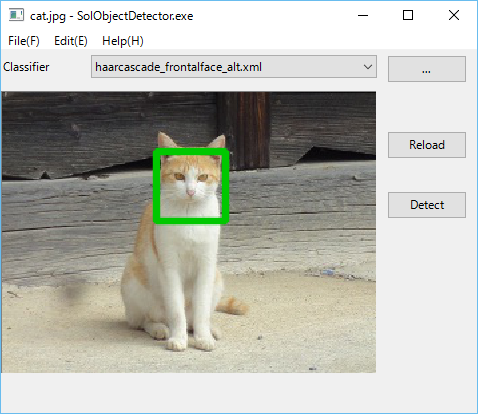
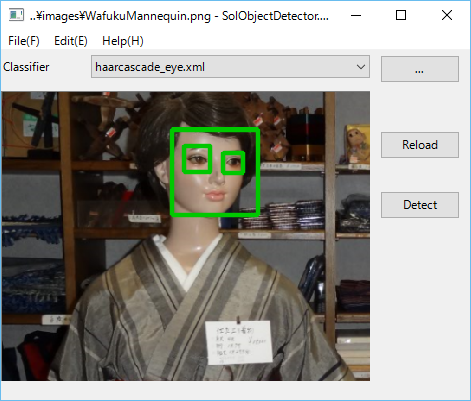
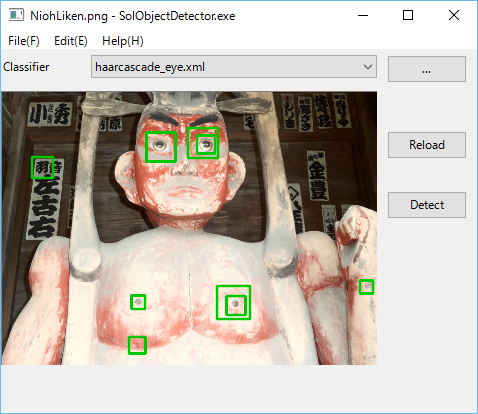
The following SolObjectDetector is a simple object detection example.
1 Select a folder which contains Harr or LBP cascade classifiers by using a folder selection dialog.
2 Select a cascade classifier xml file in a combobox.
3 Open a target image file by using a file open dialog which can be popped up by Open menu item.
4 Click Detect pushbutton.
Face detection of a cat.
Face and eyes detection of a mannequin.
Eyes detection of a Nioh.
4.24 How to detect features in an image in OpenCV?
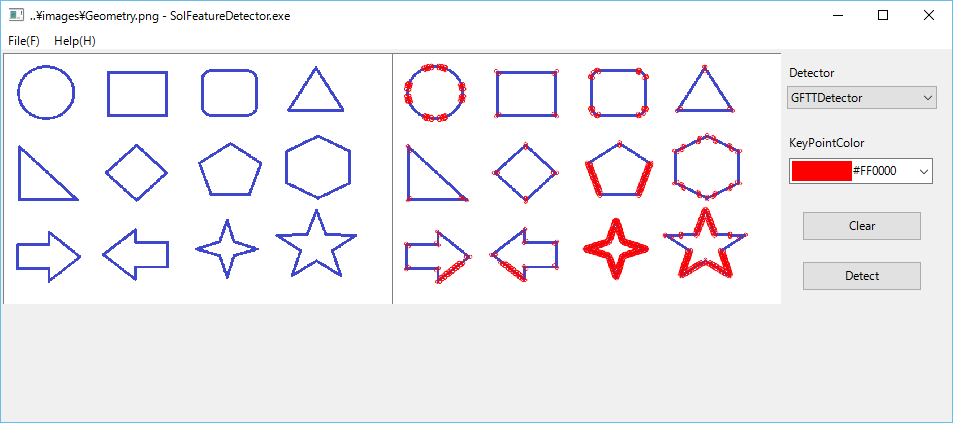
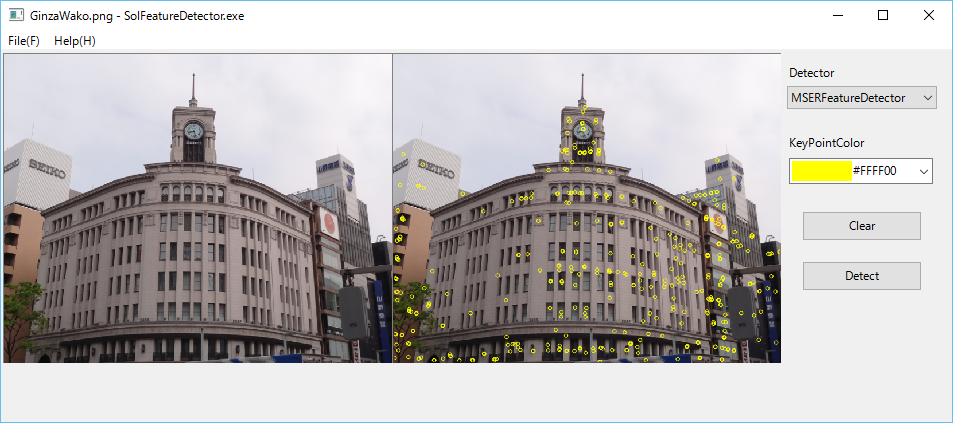
The latest OpenCV3.2.0 has a lot of various algorithms (C++ classes) to detect features in an image as shown below.
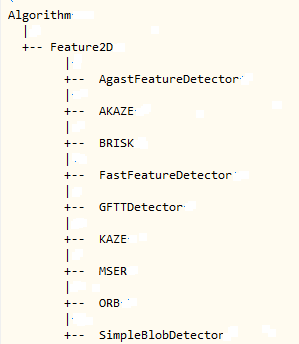
We have implemented a simple GUI program SolFeatureDetector to use these detector classes to various images.
You need the following operations to use this program.
1 Open a target image file by using a file open dialog which can be popped up by Open menu item.
2 Select a detector from detectors combobox.
3 Select a a color from a combobox color chooser.
4 Click Detect pushbutton.
5 Click Clear pushbutton to clear detected keypoints.
Feature detection in a geometry image.
Feature detection in a cloud image.

Feature detection in a building image.
4.25 How to enumerate Video Input Devices to use in OpenCV VideoCapture?
You can read a video image from a video input device somthing like a web-camera by using cv::VideoCapture class of OpenCV. As you may know, however, OpenCV has no APIs to enumerate Video Input Devices.
In Windows, you can get all video input devices informatiion by using COM interfaces of CLSID_SystemDeviceEnum, and CLSID_VideoInputDeviceCategory.
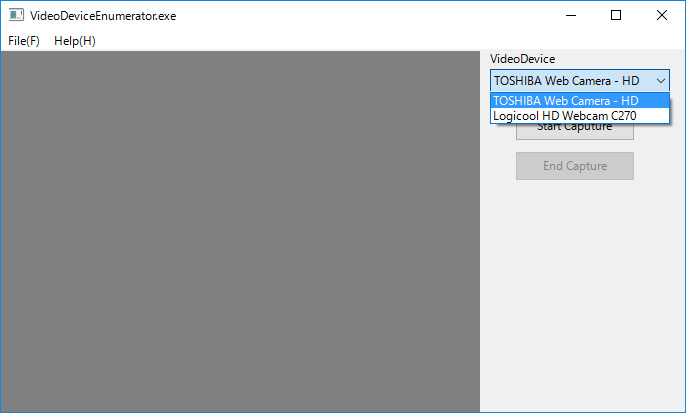
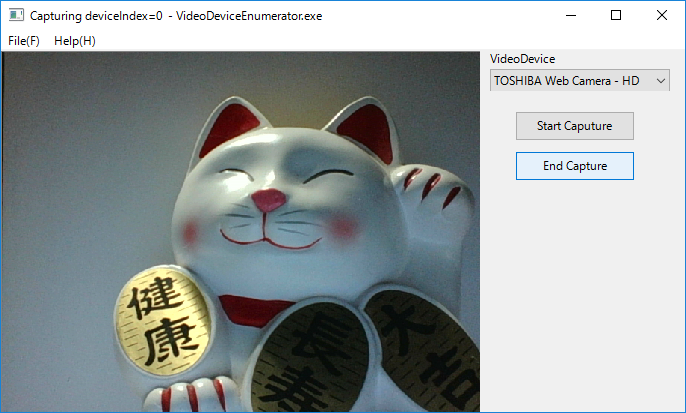
In the latest SOL9 library, we have implemented VideoInputDeviceEnumerator and LabeledVideoDeviceComboBox classes to listup and select video devices.
The following VideoDeviceEnumerator program is a simple example to select a video device from LabeledVideoDeviceComboBox, and start to read a video image from the device.
4.26 How to map cv::Mat of OpenCV to a shape of OpenGL as a texture?
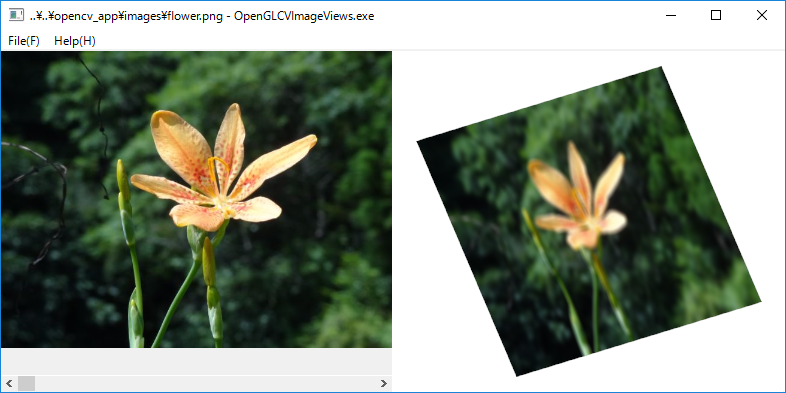
Imagine to map a cv::Mat image of OpenCV to a shape of OpenGL as a texture by using an image method of OpenGLTexture2D class of SOL9. In the latest SOL9 library, we have implemented OpenGLImageInfo and OpenCVImageInfo classes to extract the raw image data from a cv::Mat. The following OpenGLCVImageViews program is a simple example to display an OpenCVImageView and an OpenGLView side by side. In this example, we get an OpenGLImageInfo from the cv::Mat image displayed on the left pane by using OpenCVImageInfo class, and map the OpenGLImageInfo to a quad shape of OpenGL of the right pane ofas a texture. of SOL9.
4.27 How to read a frame buffer of OpenGL and convert it to cv::Mat of OpenCV?
Imagine to read pixel data of an OpenGL frame buffer and convert it to a cv::Mat image format of OpenCV.
Reading pixel data of the frame buffer can be done by using glReadPixels API of OpenGL, and creating a cv::Mat image by calling its constructor in the following way in a subclass, say SimpleGLView, derived from OpenGLView :
class SimpleGLView :public OpenGLView {
cv::Mat capture()
{
int w, h;
getSize(w, h);
w = (w/8)*8;
glReadBuffer(GL_FRONT);
glPixelStorei(GL_UNPACK_ALIGNMENT, 1);
unsigned char* pixels = new unsigned char[3 * w * h];
glReadPixels(0, 0, w, h, GL_BGR, GL_UNSIGNED_BYTE, pixels);
return cv::Mat(h, w, CV_8UC3, pixels);
}
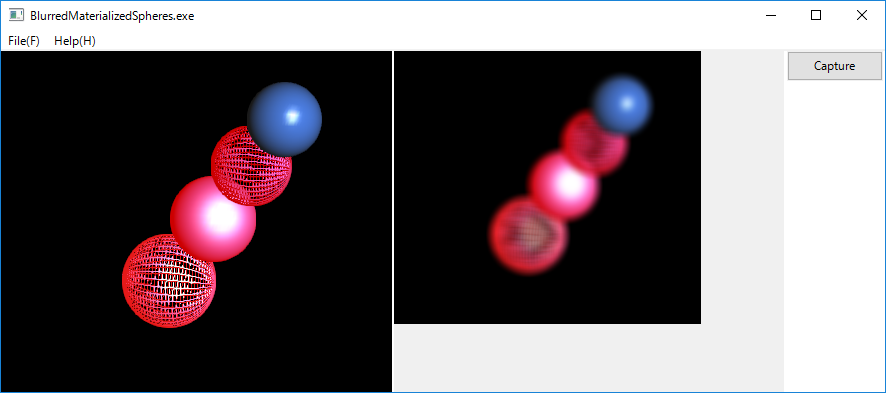
The following BlurredMaterializedSpheres program is a simple example to display some materialized shperes on an OpenGLView and a blurred cv::Mat image ,corresponding to the frame buffer of the OpenGLView, on an OpenCVImageView side by side.
4.28 How to transform an image by a dynamic color filter in OpenCV?
As you know, you can transform an image by using a cv::Mat filter(Kernel) and cv::transform API of OpenCV as shown below.
void applySepiaFilter(const char* filename)
{
cv::Mat originalImage = cv::imread(filename, cv::IMREAD_COLOR);
cv::Mat transformedImage = originalImage.clone();
//sepia filter
cv::Mat sepia = (cv::Mat_<float>(3,3) <<
0.272, 0.534, 0.131,
0.349, 0.686, 0.168,
0.393, 0.769, 0.189);
}
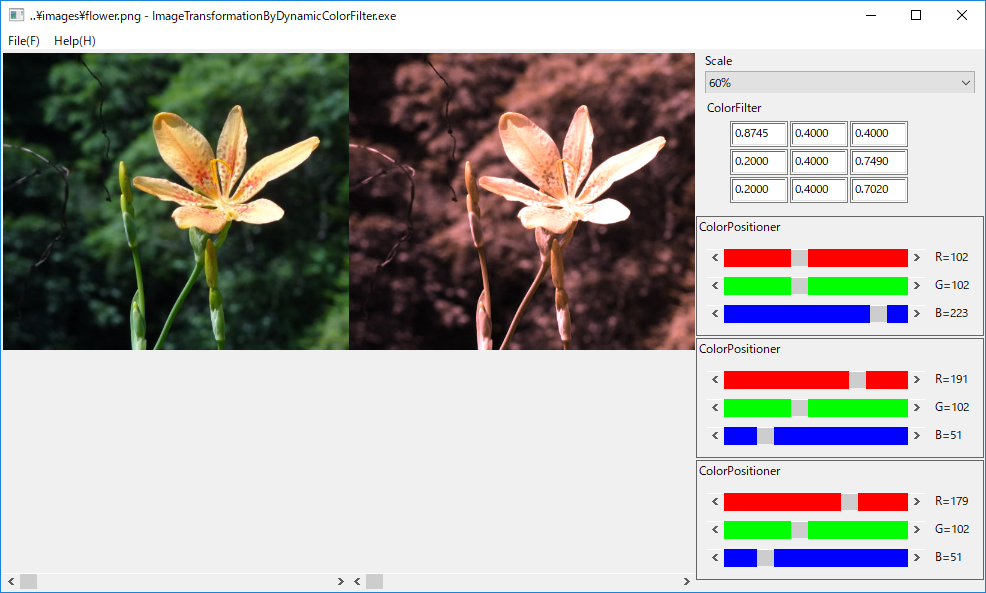
In this case, the originalImage is transformed by the constant sepia filter to the transformedImage. This is a traditional constant filter example, however, it is much better to be able to apply a dynamically changeable color filter (Kernel) to a cv::Mat image.
The following ImageTransformationByDynamicColorFilter is a simple example to implement a dynamic color filter by using OpenCVColorFilter class and ColorPositioner class of SOL9.
4.29 How to render a textured sphere with Axis, Eye, and Light Positioner in OpenGL?
As show in 4.19 How to render a textured sphere in OpenGL?, it is easy to render and rotate a sphere textured by an image file in OpenGL.
If we could dynamically change a rotation axis, an eye position, and a light position in that example, however, it would be a much better program.
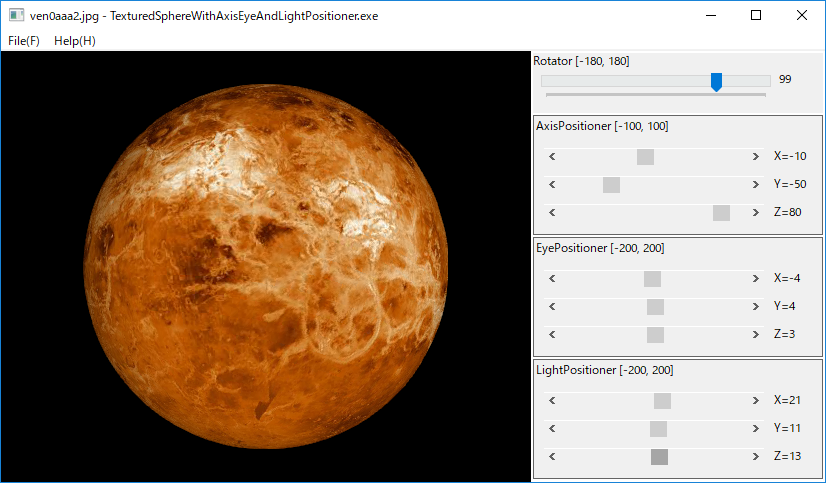
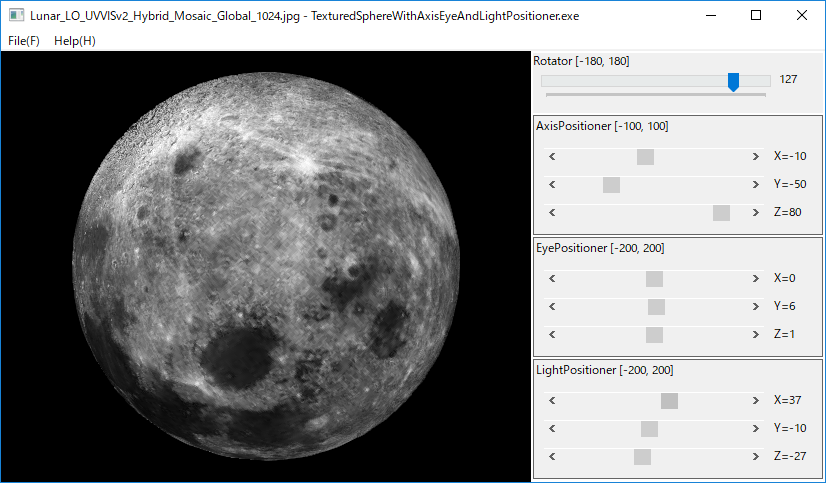
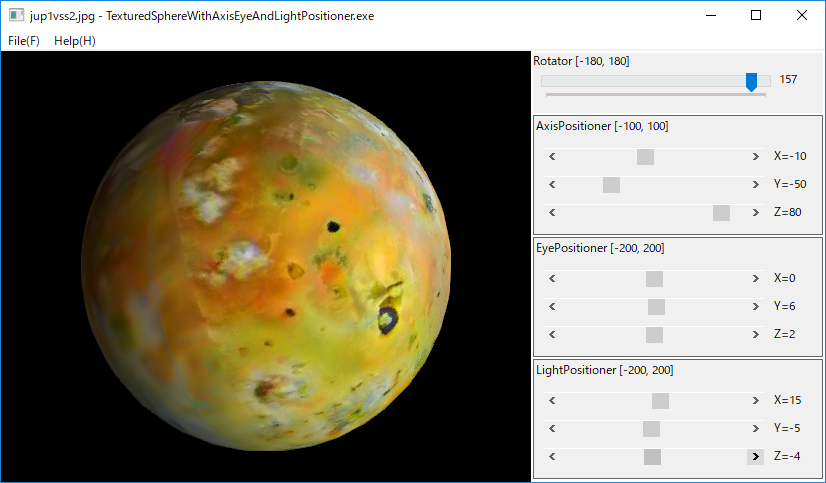
The following TexturedSphereWithAxisEyeAndLightPositioner is a simple example to render a sphere textured by a cylindrical planet map.
In this example, we have used Venus map 'ven0aaa2.jpg' Caltech/JPL/USGS in the page JPL NASA SOLAR SYSTEM SIMULATOR .
We have also used the following Lunar Orbiter's 'Lunar_LO_UVVISv2_Hybrid_Mosaic_Global_1024.jpg' in the page Astrogeology Science Center.
Furthermore, we have used the following Voyager Galileo IO 'jup1vss2.jpg' in the page JPL NASA SOLAR SYSTEM SIMULATOR
4.30 How to detect a bounding box for an object in a cv::Mat of OpenCV?
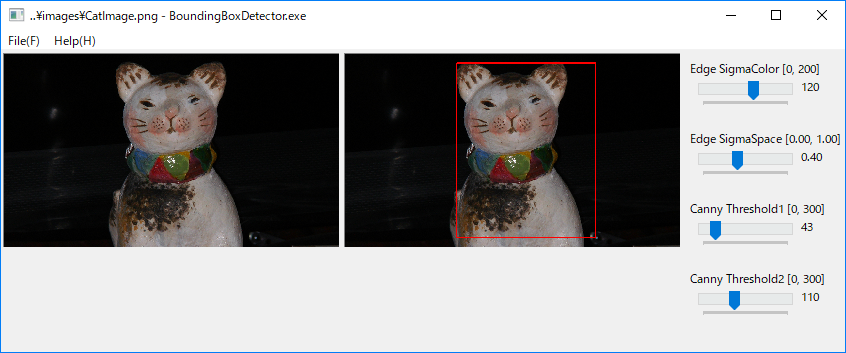
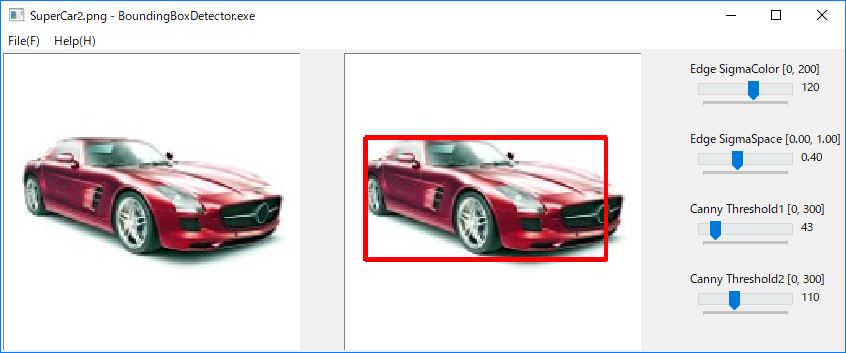
As a simple application of OpenCV APIs, we consider to find a bounding box for an object represented cv:Mat of OpenCV. In this example, we do the following operations to find a bounding box.
1. Apply cv::EdgePreseringFilter to originalImage of cv::Mat.
2. Get a grayImage from the filterdImage.
3. Apply cv::Canny Edge Detector to the grayImage.
4. Find contours from the edgeDetectedImage.
5. Get approximate polygonal coordinates from the contours.
6. Get bounding rectangles from the contours polygonal coordinates.
7. Find a single rectangle from the bounding rectanglese set.
The following BoundingBoxDetector is a simple example to implement above operations to detect a single bounding box for an object in cv::Mat image.
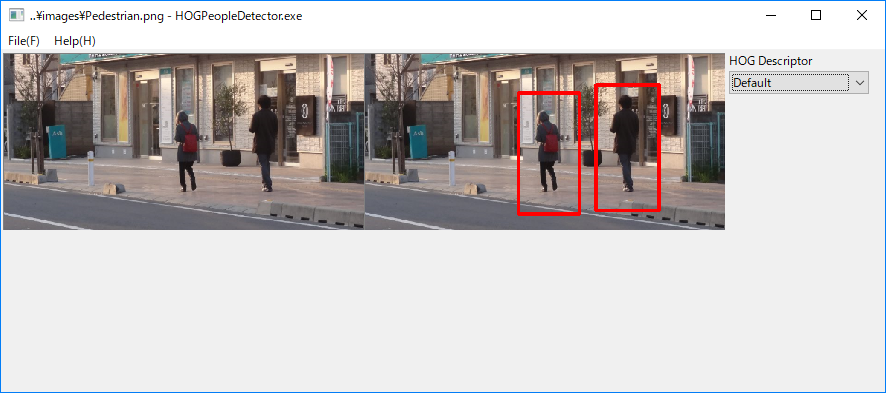
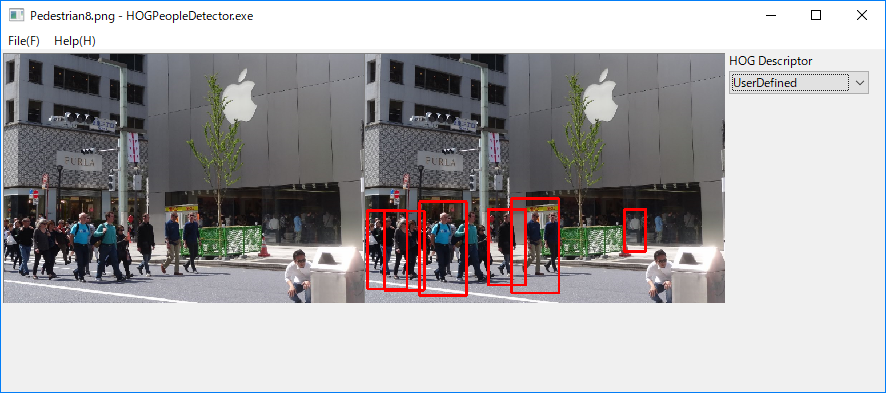
4.31 How to detect people in a cv::Mat image by using HOGDescriptor of OpenCV?
As you know, HOGDescriptor is an implementation of HOG (Histogram of Oriented Gradients) Descriptor of OpenCV and object detector.
HOGDescriptor supports two pre-trained people detector which can be returned by the following methods respectively:
1. getDaimlerPeopleDetector()
2. getDefaultPeopleDetector()
The following HOGPeopleDetector is a simple example to detect people a in cv::Mat image by using above PeopleDetectors and a user-defined PeopleDetector.
4.32 How to create CustomYoloObjectDetector class based on C APIs of darknet-master?
As you may know, you can use Detector C++ class in yolo_v2_class.hpp in include folder of darkent-master to detect objects in cv::Mat image as shown in the following example:
YoloObjectDetector
The Detector class is very simple to use, and very useful to get detailed information on the detected objects, provided you need not an image which the bounding rectangles and names on the detected objects are not drawn.
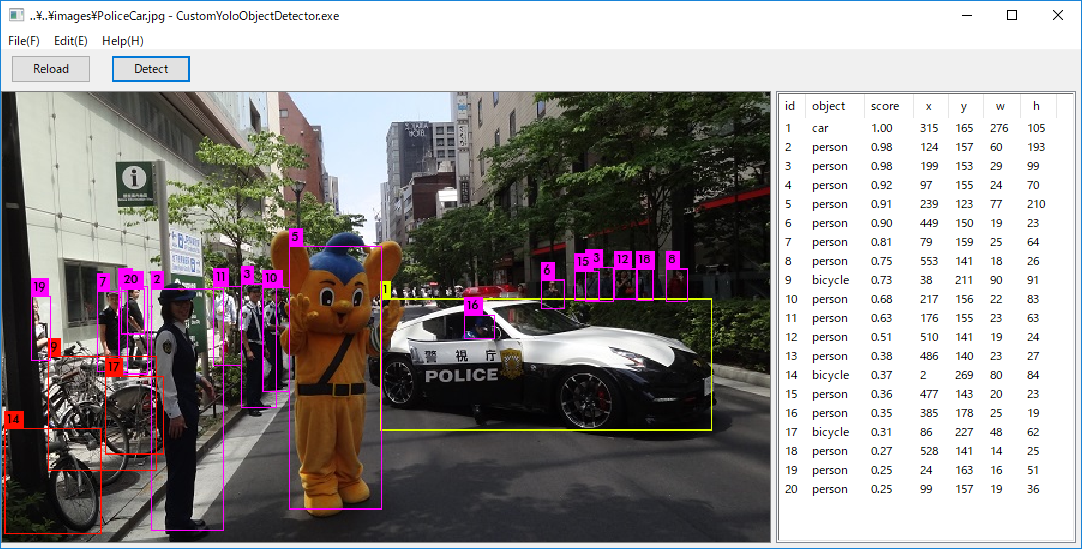
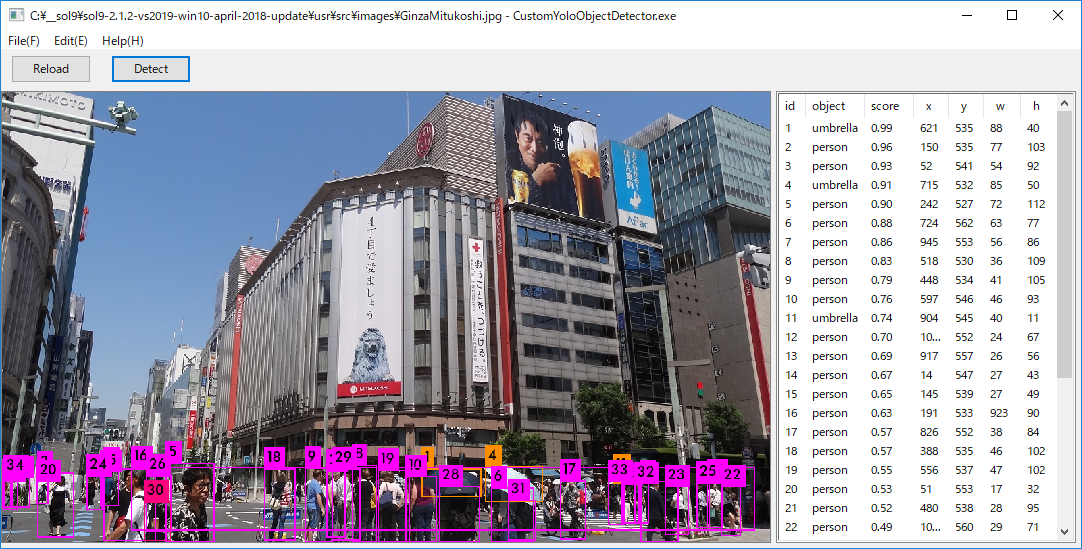
You can also create your own Detector C++ class by extending C APIs of dector.c, image.c, etc. in darknet_master/src folder.
The Detector3 is an example implementation class, and the following CustomYoloObjectDetector is a simple example to detect objects a in cv::Mat image by using the Detector3.
4.33 How to create DetectedObjectHTMLFileGenerator for YOLO by using SOL Detector3 and a template.html file ?
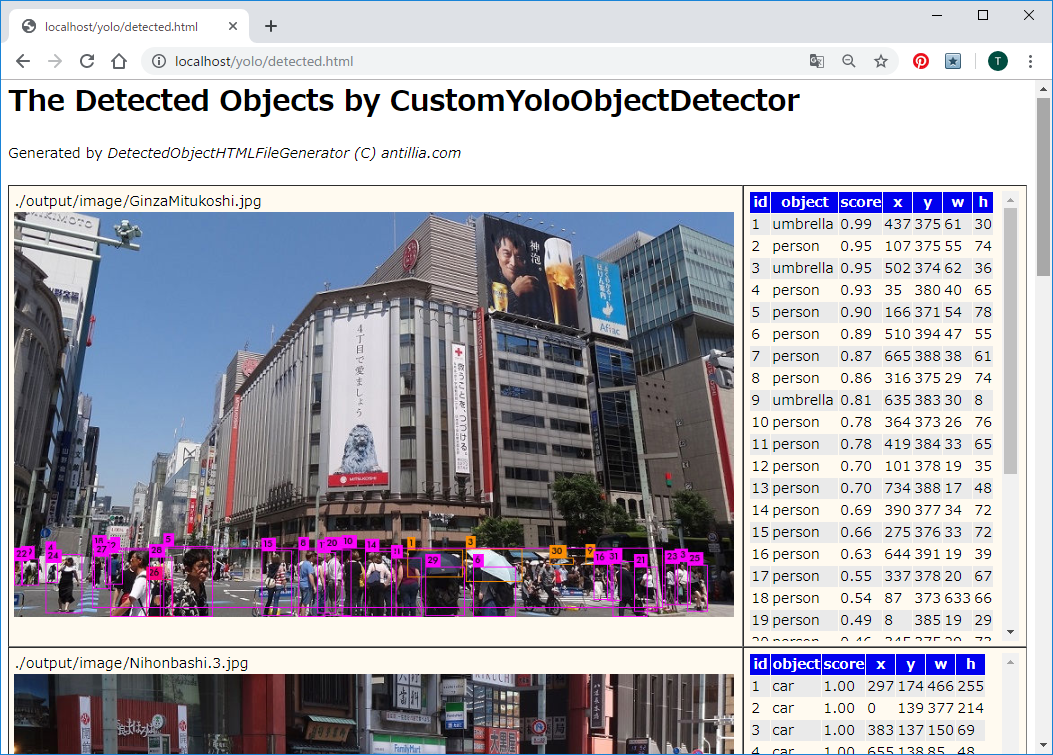
It's much better to create an HTML file to display a detected-objects-image on a web browser than an interactive native UI program something like CustomYoloObjectDetector.
We have created an elementary command line program (DetectedObjectHTMLFileGenerator for YOLO) to generate such an HTML file from a source image folder by using Detector3 C++ class and a template.html HTML file.
The following web browser screen shot is a result of an example html file detected.html generated by the program.
Last modified: 10 Feb. 2020
Copyright (c) 2000-2020 Antillia.com ALL RIGHTS RESERVED.